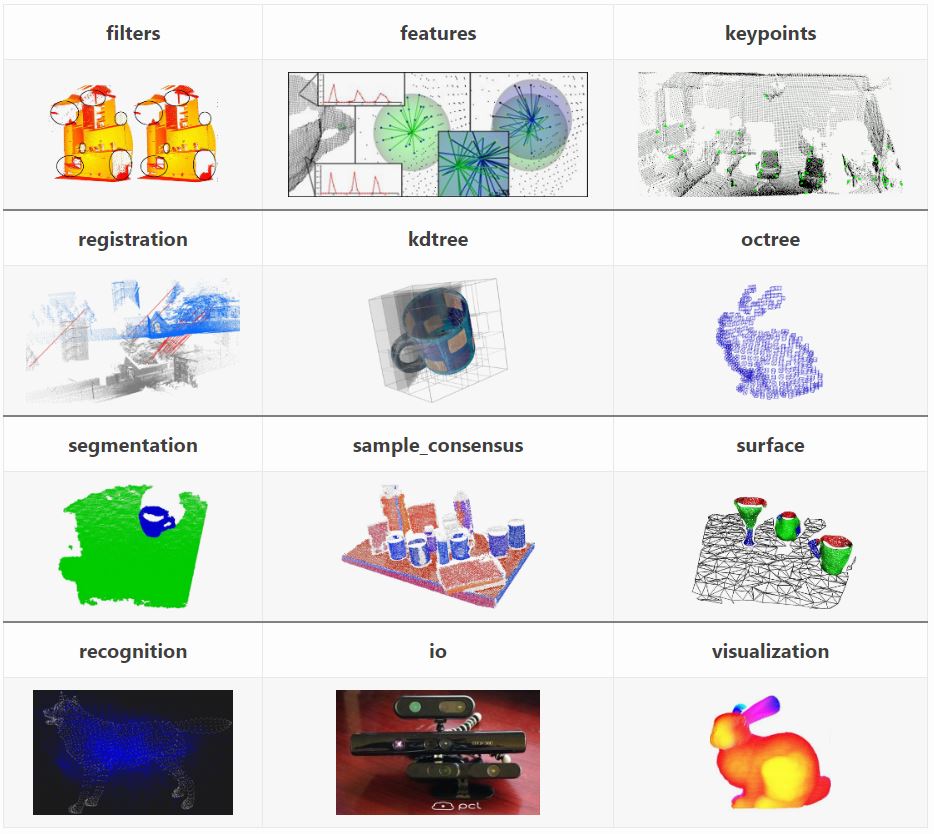
Point Cloud Library를 사용해야 하는 이유
Point Cloud Library(사이트는 여기) LiDAR나 RGB-D 카메라를 통해 취득한 pointcloud를 후처리하는데 사용되는 알고리즘을 구현해둔 라이브러리입니다. 특히, SLAM등이나 navigation을 할 때 써야하는 filter 알고리즘, voxelization, registration (i.e. ICP나 NDT 등) 등이 이미 구현되어 있어서 pointcloud를 후처리하거나 SLAM 알고리즘을 개발할 때 편리합니다. 특히, 연구레벨에서도 PCL 자체가 깔끔한 상속으로 구성되어 있어서 자기만의 수정된 알고리즘을 구현할 때에도 PCL의 부분부분을 상속받아서 쉽게 수정하여 사용가능한 것으로 알고 있습니다.
기초적인 사용법
PCL 선언하는 법 & T Type
T Type
pcl에서 구현되어 있는 Pointcloud 타입 pcl::PointCloud<T>에는 다양한 type을 담을 수 있는데,
주로 LiDAR를 사용할 때는 pcl::PointXYZ, pcl::PointXYZI를 많이 사용합니다.
RGB-D나 스테레오 카메라는 depth를 image에 align시키면 point의 색깔도 알 수 있기 때문에 pcl::PointXYZRGB를 사용하기도 합니다.
더 다양한 type은 원래 pcl tutorial 페이지에서 확인 가능합니다.
pcl::PointCloud<pcl::PointXYZ> cloud;
pcl::PointCloud<pcl::PointXYZI> cloud;
pcl::PointCloud<pcl::PointNormal> cloud;
pcl::PointXYZ point_xyz;
point_xyz.x = 1;
point_xyz.y = 2;
point_xyz.z = 3;
혹은 아래와 같이 한 줄로 선언이 가능합니다.
pcl::PointXYZ point_xyz = {1, 2, 3}; // 1, 2, 3이 각각 x, y, z로 지정된다.
pcl::PointCloud 선언해서 Points에 Point 넣는 법
전문 코드는 아래와 같습니다.
기본적으로 pcl은 std::vector의 사용법과 유사합니다.
왜냐하면 pcl의 내부를 살펴보면 std::vector로 구성되어 있기 때문입니다 :) (여기를 참조하시면 알 수 있습니다)
pcl::PointCloud<pcl::PointXYZ> cloud_init0;
cloud_init0.resize(3); //cloud의 size를 3으로 설정

cloud_init0.points[0].x = 1;    cloud_init0.points[0].y = 2;    cloud_init0.points[0].z = 3;
cloud_init0.points[1].x = 4;    cloud_init0.points[1].y = 5;    cloud_init0.points[1].z = 6;
cloud_init0.points[2].x = 7;    cloud_init0.points[2].y = 8;    cloud_init0.points[2].z = 9;
or
pcl::PointCloud<pcl::PointXYZ> cloud_init1;
pcl::PointXYZ point_xyz; // pcl::PointXYZ이라는 type에 data를 담는다.

point_xyz.x = 1;    point_xyz.y = 2;    point_xyz.z = 3;
cloud_init1.push_back(point_xyz);
point_xyz.x = 4;    point_xyz.y = 5;    point_xyz.z = 6;
cloud_init1.push_back(point_xyz);
point_xyz.x = 7;    point_xyz.y = 8;    point_xyz.z = 9;
cloud_init1.push_back(point_xyz);
or
pcl::PointCloud<pcl::PointXYZ> cloud_init2;
cloud_init2.push_back(pcl::PointXYZ(1, 2, 3));
cloud_init2.push_back(pcl::PointXYZ(4, 5, 6));
cloud_init2.push_back(pcl::PointXYZ(7, 8, 9));
출력을 하면 아래와 같은 결과가 출력됩니다.
template <class T>
void print_pc(pcl::PointCloud<T>& cloud){
    int count = 0;
    for (const auto& pt: cloud.points){
        cout << count++ << ": ";
        cout <<pt.x << ", "<<pt.y << ", "<< pt.z << endl;
    }
}
Result:
0: 1, 2, 3
1: 4, 5, 6
2: 7, 8, 9
Functions
http://docs.pointclouds.org/1.8.1/classpcl_1_1_point_cloud.html
begin(): PointCloud의 첫 부분을 가르키는 iterator를 반환함
cout << "begin(): ";
cout << cloud.begin()->x << ", ";
cout << cloud.begin()->y << ", ";
cout << cloud.begin()->z << endl;
->의 의미는 이 블로그 글에 잘 설명돼있습니다.
->의 의미 한 줄 요약: return 값이 주소값이기 때문에, 주소값이 가르키는 객체의 멤버변수/멤버함수는 ->로 지칭함.
Result::
begin(): 1, 2, 3
end(): PointCloud의 끝 부분을 가르키는 iterator를 반환함
cout << "end(): ";
cout << cloud.end()->x << ", ";
cout << cloud.end()->y << ", ";
cout << cloud.end()->z << endl;
Result:
end(): 0, 0, 0
왜 0, 0, 0?: vector의 end()처럼 마지막 요소의 다음 부분을 가르키는 iterator를 리턴하기 때문! 즉 (0, 0, 0)은 메모리 상 값이 할당되지 않은 부분을 가르켜 값을 가져왔기 때문에 뜨는 숫자들입니다.
따라서 pcl::PointCloud의 제일 뒷쪽의 요소를 가르키는 iterator를 뜻하려면 std::vector와 마찬가지로 -1을 빼주어 사용해야 합니다.
cout << "end() -1: ";
cout << (cloud.end()-1)->x << ", ";
cout << (cloud.end()-1)->y << ", ";
cout << (cloud.end()-1)->z << endl;
Result:
end() - 1: 7, 8, 9
front(): 첫번째 원소를 반환함
cout << "front(): ";
cout << cloud.front().x << ", ";
cout << cloud.front().y << ", ";
cout << cloud.front().z << endl;
Result:
front(): 1, 2, 3
back(): 마지막 요소를 반환함
cout << "back(): ";
cout << cloud.back().x << ", ";
cout << cloud.back().y << ", ";
cout << cloud.back().z << endl;
Result:
back(): 7, 8, 9
at(int index) pcl::PointCloud 상의 index에 해당하는 요소를 반환함.
cout << "at(1): ";
cout << cloud.at(1).x << ", ";
cout << cloud.at(1).y << ", ";
cout << cloud.at(1).z << endl;
Result:
at(1): 4, 5, 6
empty()
if (cloud.empty()) cout << "True"; else cout << "False";
cout << " | size of pc: " << cloud.size() << endl;
Result:
False | size of pc: 3
clear()
cloud.empty();
if (cloud.empty()) cout << "True"; else cout << "False";
cout << " | size of pc: " << cloud.size() << endl;
Result:
True | size of pc: 0
★PointCloud 합치기
이런 pythonic한 문법이 되다니…갓PCL…
pcl::PointCloud<pcl::PointXYZ> cloud2;
cloud2.push_back(pcl::PointXYZ(1, 2, 3));
cloud2.push_back(pcl::PointXYZ(4, 5, 6));

pcl::PointCloud<pcl::PointXYZ> cloud3;
cloud3.push_back(pcl::PointXYZ(7, 8, 9));
cloud3.push_back(pcl::PointXYZ(10, 11, 12));

cloud2 += cloud3;

cout <<"size: " << cloud2.size() << endl;
print_pc(cloud2);
Result:
size: 4
0: 1, 2, 3
1: 4, 5, 6
2: 7, 8, 9
3: 10, 11, 12
std::vector의 특성상 무조건 뒤쪽으로 쌓이는 것을 확인할 수 있습니다.
+=는 값을 할당하는 걸까, 복사하는 걸까?
cloud3.push_back(pcl::PointXYZ(12, 13, 14));
cout<<"After: "<<endl;
print_pc(cloud2);
cout<<"cloud3?: "<<endl;
print_pc(cloud3);
Result:
After:
0: 1, 2, 3
1: 4, 5, 6
2: 7, 8, 9
3: 10, 11, 12
cloud3?:
0: 7, 8, 9
1: 10, 11, 12
2: 12, 13, 14
결과가 그대로임을 알 수 있습니다. 즉, += operation은 주소를 할당받아 link되어 있지 않고, points들을 통째로 복사해온다는 것을 알 수 있습니다.
Point Cloud Library Tutorial 시리즈입니다.
모든 코드는 이 레포지토리에 있고, ros package로 구성되어 있어 build하여 직접 돌려보실 수 있습니다
- ROS Point Cloud Library (PCL) - 0. Tutorial 및 기본 사용법
- ROS Point Cloud Library (PCL) - 1. Ptr, ConstPtr의 완벽 이해 (1) shared_ptr
- ROS Point Cloud Library (PCL) - 1. Ptr, ConstPtr의 완벽 이해 (2) Ptr in PCL
- ROS Point Cloud Library (PCL) - 1. Ptr, ConstPtr의 완벽 이해 (3) Ptr in 클래스 멤버변수
- ROS Point Cloud Library (PCL) - 2. 형변환 - toROSMsg, fromROSMsg
- ROS Point Cloud Library (PCL) - 3. Transformation
- ROS Point Cloud Library (PCL) - 4. Viewer로 visualization하는 법
- ROS Point Cloud Library (PCL) - 5. Voxelization
- ROS Point Cloud Library (PCL) - 6. PassThrough
- ROS Point Cloud Library (PCL) - 7. Statistical Outlier Removal
- ROS Point Cloud Library (PCL) - 8. KdTree를 활용한 Radius Search
- ROS Point Cloud Library (PCL) - 9. KdTree를 활용한 K-nearest Neighbor Search (KNN)
- ROS Point Cloud Library (PCL) - 10. Normal Estimation
- ROS Point Cloud Library (PCL) - 11. Iterative Closest Point (ICP)
- ROS Point Cloud Library (PCL) - 12. Generalized Iterative Closest Point (G-ICP)
- ROS Point Cloud Library (PCL) - 13. getVector3fMap()을 통한 효율적인 복사
